Settings
Inspect and format storage, read battery information, restart or power off, update both processors, and verify device identity.
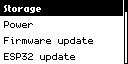
Storage
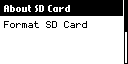
About SD Card
About SD Card displays the card’s filesystem, capacity, free space, and mount status.
- Open About SD Card.
- Use Left and Right through information pages when arrows appear.
- Review filesystem, capacity, used/free space, and mount details shown.
- Press Back.
Format SD Card
Format SD Card erases and prepares the microSD card for use by the M1.
- Back up every required file.
- Leave USB Drive and stop captures or updates.
- Open Format SD Card and read the warning.
- Continue only if you want to erase everything on the card.
- Keep power connected through format and remount.
- Verify with About SD Card and the file browser.
Credentials, captures, dictionaries, databases, and update files will be lost.
Power
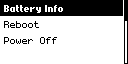
Battery Info
Battery Info displays the M1’s current battery measurements and charging state.
Use Left and Right to move through the measurement pages. Record the displayed charge, voltage, current, temperature, health, or status fields. Back returns.Reboot
Reboot restarts the M1 without removing power.
- Stop radio, storage, bridge, capture, and update operations.
- Choose Reboot and confirm.
- Wait for the home screen, then try the feature again.
Power Off
Power Off shuts the M1 down after active work has been stopped.
- Stop writes and safely eject USB Drive.
- Choose Power Off and confirm.
- Wait for screen and indicators to turn off.
- Use the documented power-on control to restart.
Firmware update
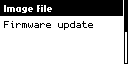
Image File
Image File selects the STM32 firmware image that the M1 will install.
- Copy the approved STM32 image to its release-specified location.
- Choose Image File, browse to the exact artifact, and press Center.
- Verify the selected filename on return.
Firmware update
Firmware update validates and installs the selected STM32 image.
- Charge and connect stable USB power.
- Choose Firmware update after verifying the image.
- Do not remove power or card during validation, erase, write, or reboot.
- After restart, verify Settings → About.
Filename or build number alone does not prove hardware or regional compatibility. Verify the published checksum.
ESP32 update
Image File
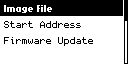
Image File selects the ESP32-C6 firmware image used by the wireless processor.
Select the exact ESP32-C6 image supplied with the release, never the STM32 image.Start Address
Start Address sets the flash location specified for the selected ESP32-C6 image.
Use Left and Right for the release-specified address. Do not guess from another product or build.Firmware Update
Firmware Update writes the selected image to the ESP32-C6 at the configured address.
- Confirm image, matching checksum/sidecar, and start address.
- Connect stable power and leave Wi-Fi/Bluetooth.
- Choose Firmware Update.
- Keep power connected until completion.
- Reboot and test Wi-Fi and Bluetooth.
STM32 and ESP32-C6 images are different. Updating one does not repair an incompatible image on the other.
About
About displays the M1 model, firmware version, build information, and identifiers used for support.
- Open About.
- Use Left and Right on Prev. and Next.
- Record model, firmware/build label, and identifiers needed for support.
- Press Back.
For support, include screen name, build label, last action, storage state, and whether Wi-Fi, Bluetooth, USB Drive, or external hardware was active.
Troubleshooting
| Problem | What to do |
|---|---|
| SD info unavailable | Reinsert card, leave USB Drive, and reboot before formatting. |
| Format failed | Use stable power and a supported card; back up before computer repair. |
| Image refused | Verify the file type, size, checksum, and battery level. |
| ESP32 update fails | Verify image/address pair and retry only with the approved release set. |
| No reboot | Use the recovery guide; do not alter option bytes from unrelated instructions. |
Visual guide
Need help? Email support@monstatek.com and include the firmware version and screen name.